The following is a guest post from regular contributor, Kristin at The O.C.D Life.
In my last command center post, I shared the 5 steps I used when creating a family command center. It took me 6 months of debating, evaluating, and revising my plan, but it is finally complete. And, I am ready to share it with y’all today.
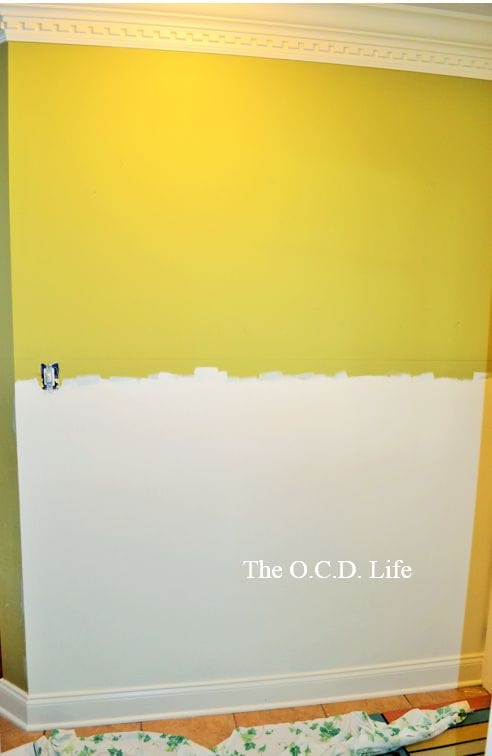
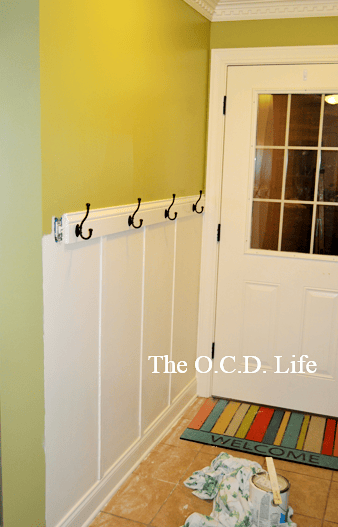
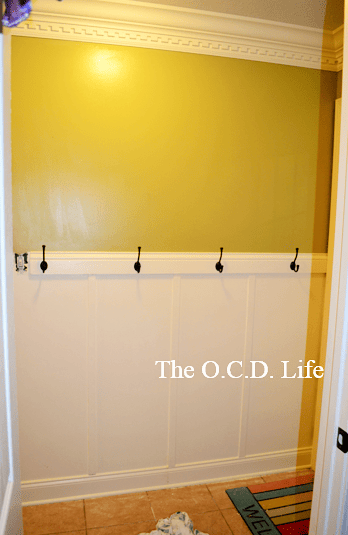
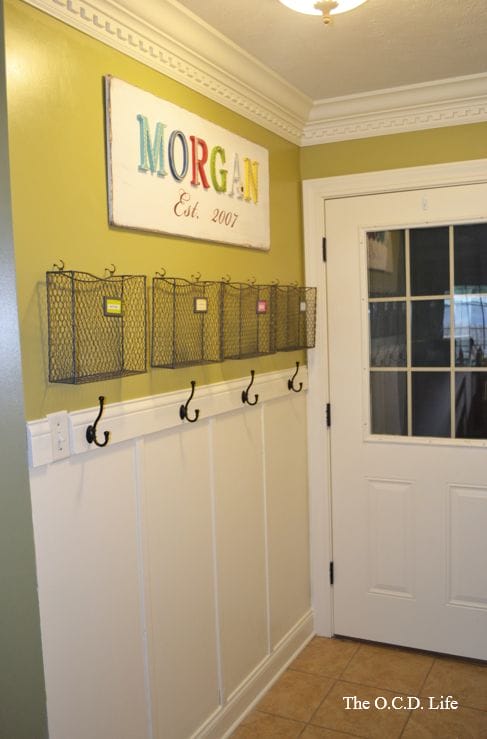
Remember, the before:

Overall, this area was a complete waste of space. The door in the photos is the one that we use every single day, which means we pass this area daily coming into our home. Since it is the first thing we pass as we enter, we have been missing out on valuable storage space. By doing this, our kitchen chairs and counters have become clutter playgrounds. I have tried several random things on this wall, but at the end of the day, they have looked thrown together. So, I actually spent time on the area and came up with a solution that works for our family.
And, here is how I accomplished this goal of mine.
Step 1: Decide on the layout
My command center needed to be a place to:
- hang coats and sweaters
- place outgoing mail
- place important documents for school/work
- separate each person’s items
After carrying around a legal pad and continuously sketching and re-sketching, this is my final design. I should note, I am not an artist. I was not blessed with artistic abilities.
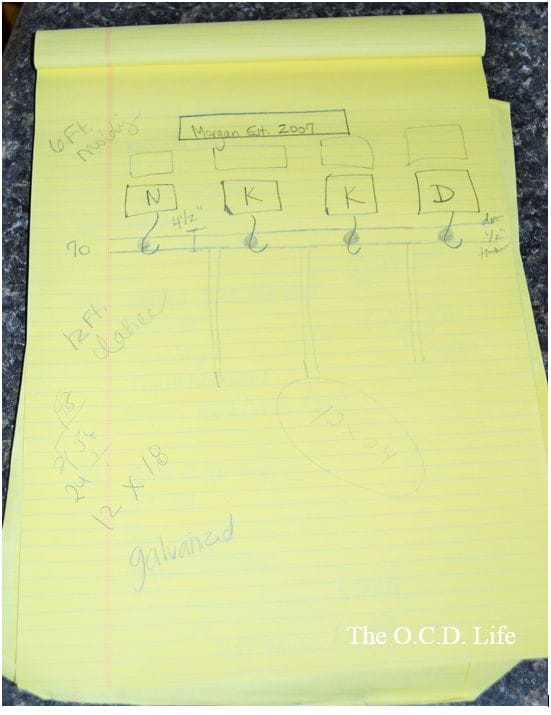
I wanted to do a board and batten approach to the wall because I thought it would add some character to the space. Using this process meant that half of the wall would be painted one color while the other portion would be a white color.
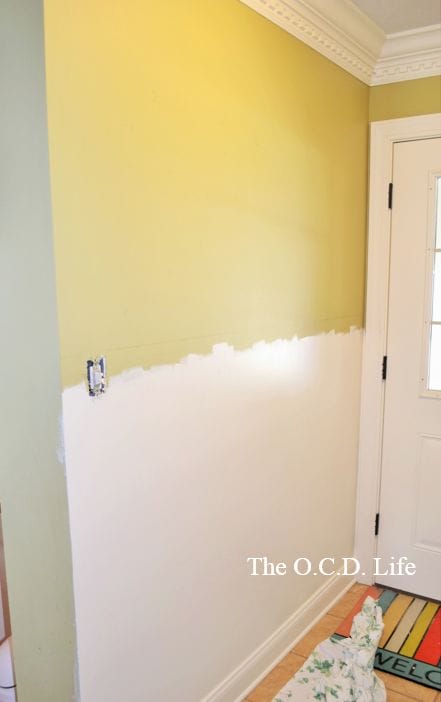
Step 2: Decide on the paint colors
This was probably the hardest step of them all. I couldn’t decide if I wanted to keep the original Sherwin-Williams Bamboo Shoot (green) color or if I wanted to do something different. I even asked for some opinions about chalkboard paint on facebook.
After several weeks of debating and asking for opinions, I decided to stick with the original color for the top portion and Sherwin-Williams Dover White for the bottom portion of the wall.
Step 3: Determine the different sections & paint
My husband helped me mark off the two sections with a pencil (we used the electrical outlet area as our divider). Then, I painted the two sections. It took approximately three coats for the bottom and two coats for the top.
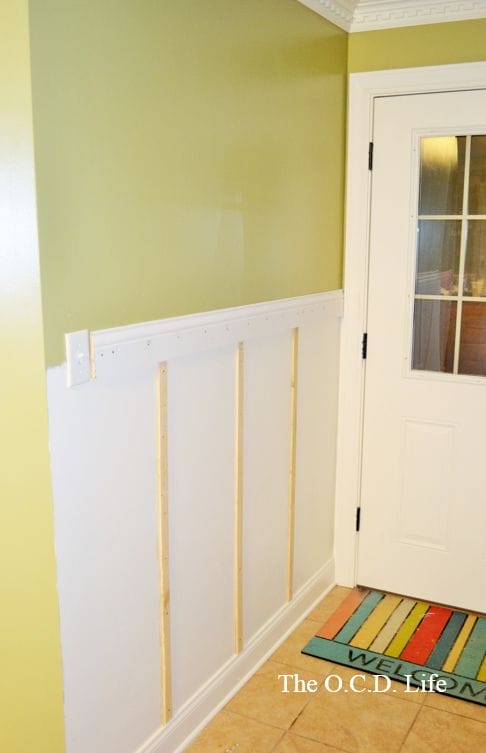
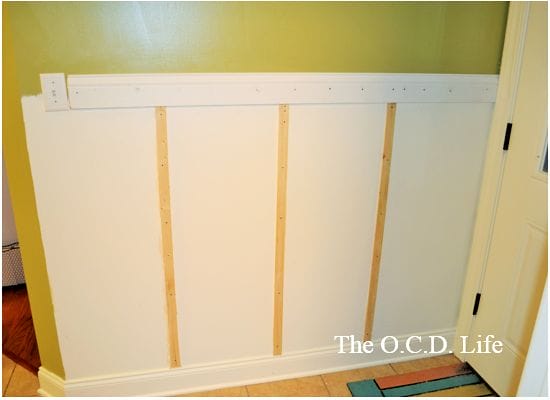
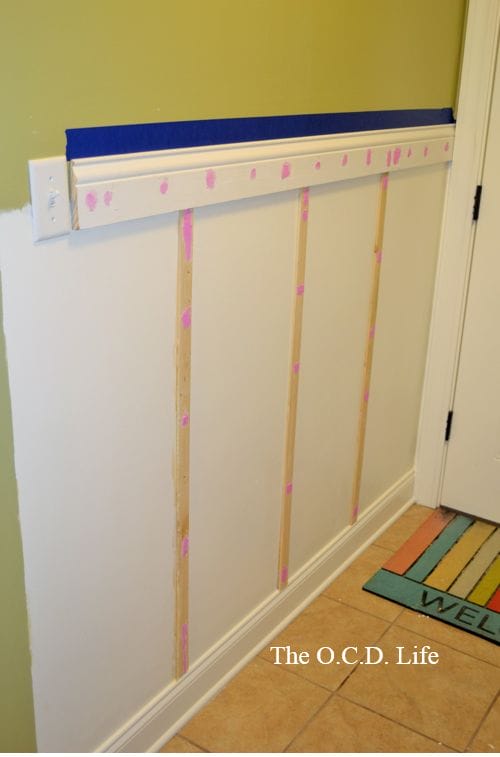
Step 4: Create the board & batten
I can’t take any of the credit for this step. I used Amy’s “How to Install Board & Batten” tutorial from Positively Splendid to create the effect and my husband did all of the manual work. I am not skilled when it comes to power tools and carpentry work, so I have to get some help when it comes to those things.
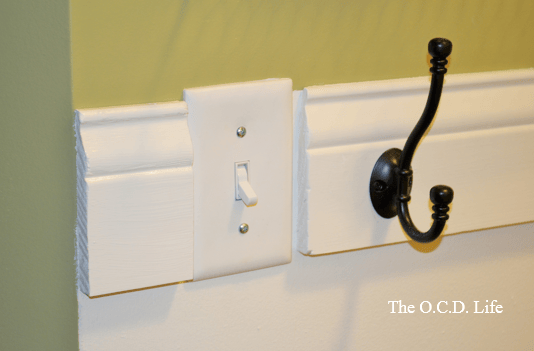
The horizontal board was actually a base board that we purchased at Lowe’s. The vertical boards were trellis pieces that we purchased from Lowe’s. The left corner beside the light switch will be touched up at the end.
Step 5: Fix the imperfections
Using putty, I covered the nail heads and any other holes or dents. Before painting, I wanted to make sure I had a smooth surface.
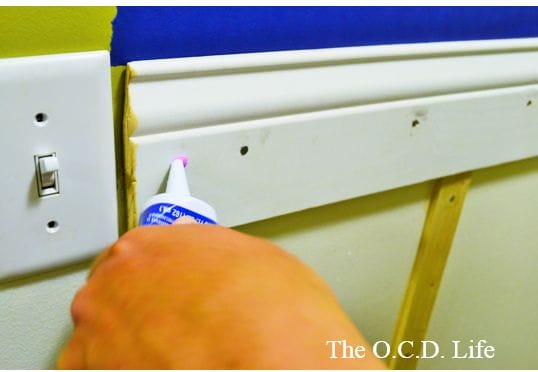
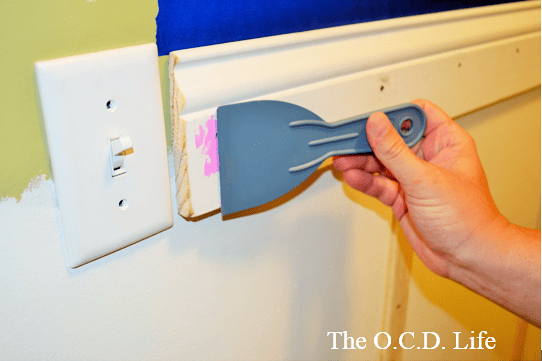
Step 6: Sand down the putty to make the surface smooth
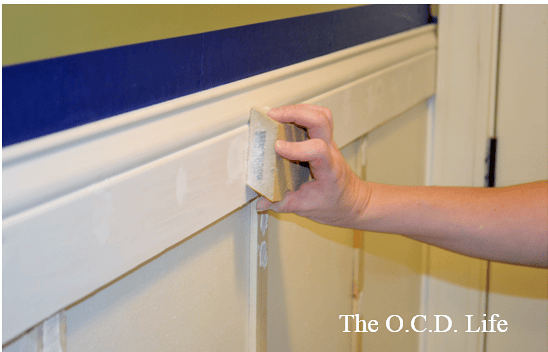
Step 7: Paint the board & batten area
I made sure to apply painter’s tape to the green area of the wall, so my white paint wouldn’t accidentally get applied to it.
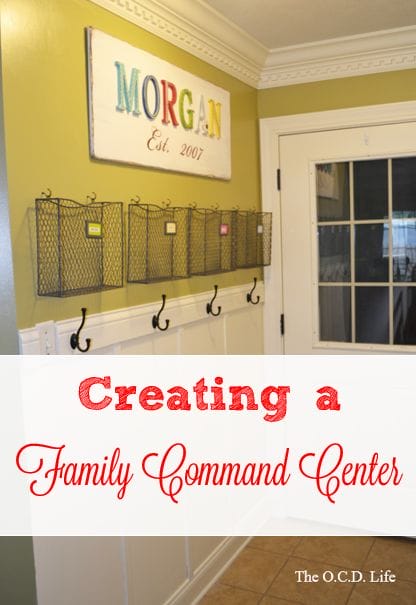
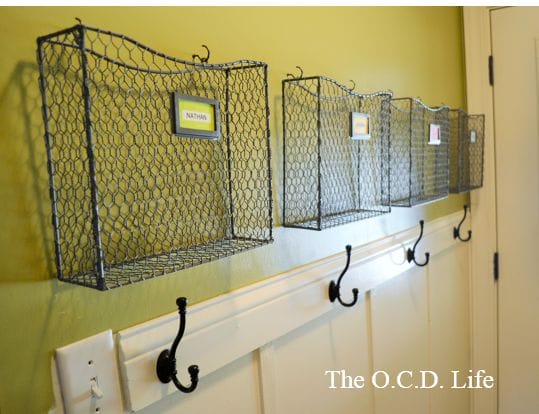
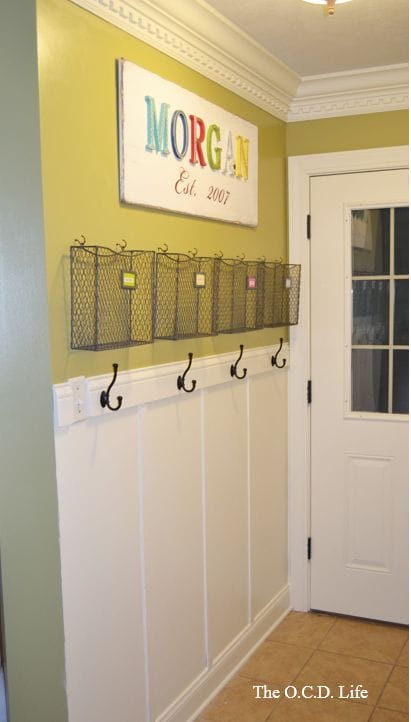
Step 8: Apply the hooks
We purchased four of the Brainerd Zinc Die Cast Garment Hook from Lowe’s.
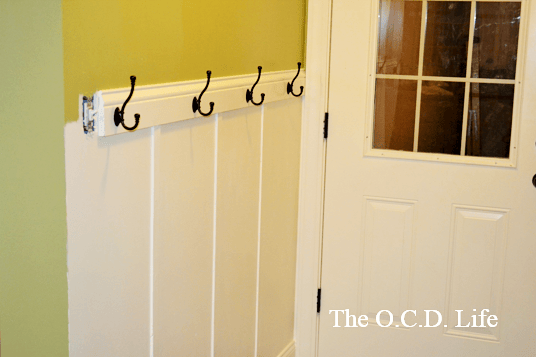
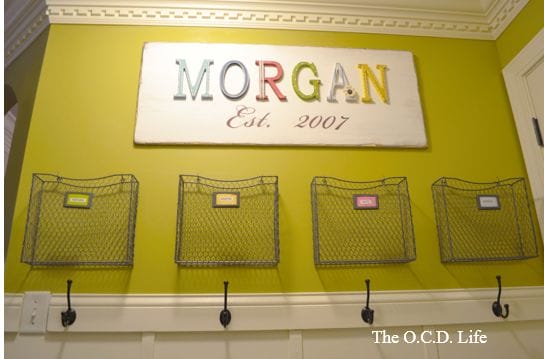
Step 9: Add the baskets above the hooks
After looking everywhere for cute and inexpensive baskets, Pick Your Plum had some that were deeply discounted ($9.99 each) that worked perfectly. So, I snatched up four of them for my command center.
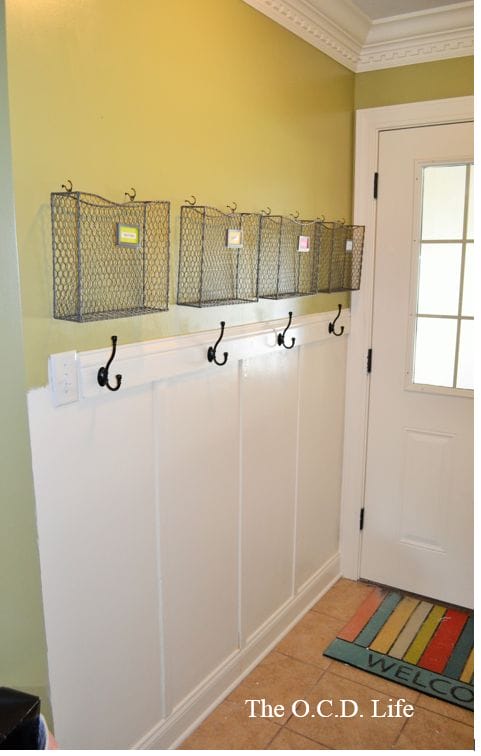
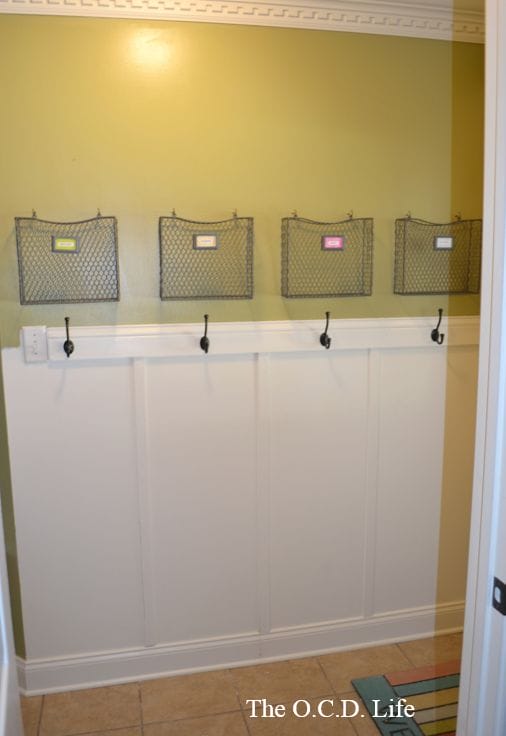
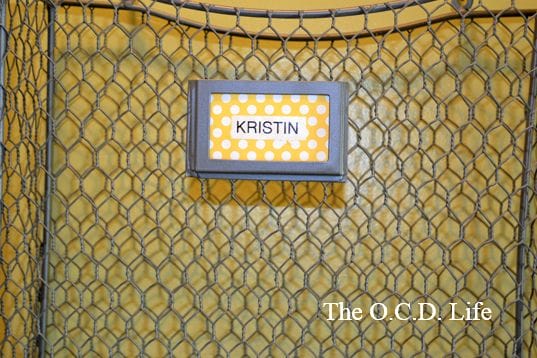
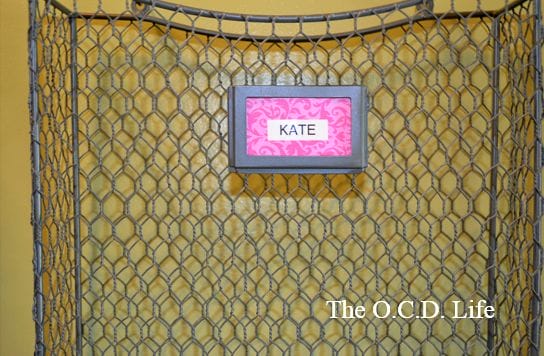
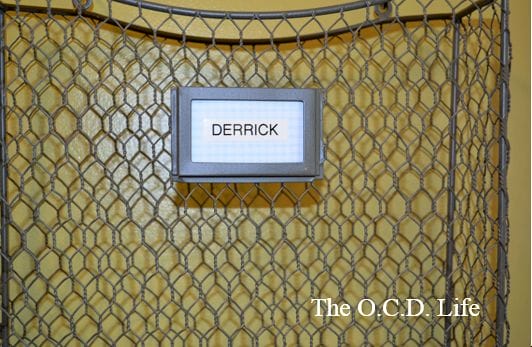
Step 10: Add a label to the front of each basket
I used extra scrapbook paper and my label maker to make each label.
Green – Nathan
Yellow – Me
Pink – Kate
Blue – Derrick
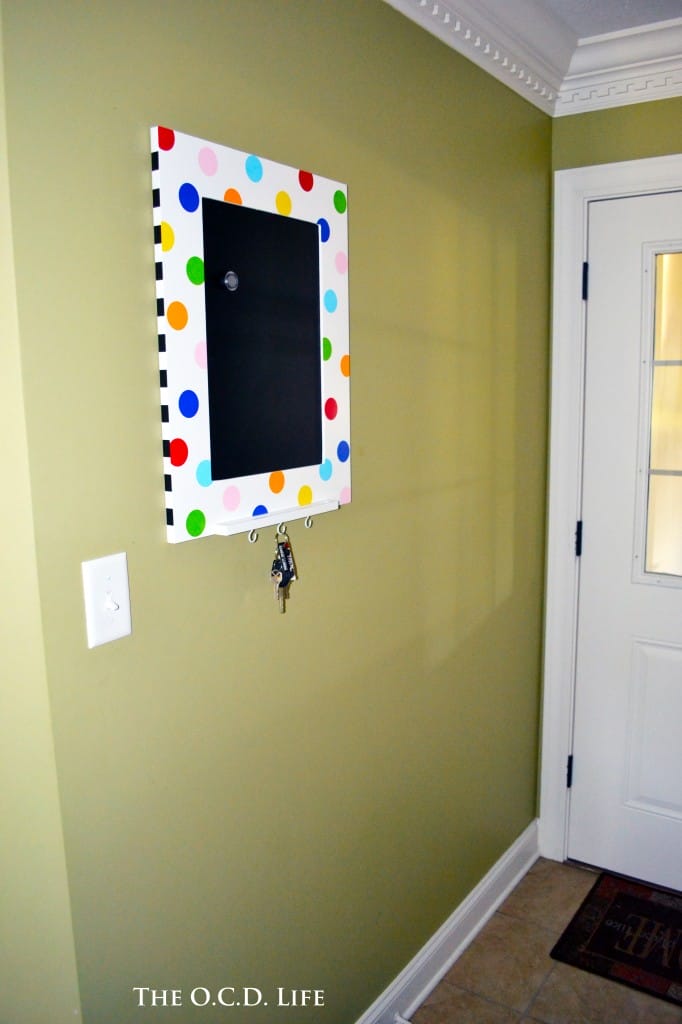
Step 11: Fix the small corner beside the light switch
And, my FAVORITE part of all…
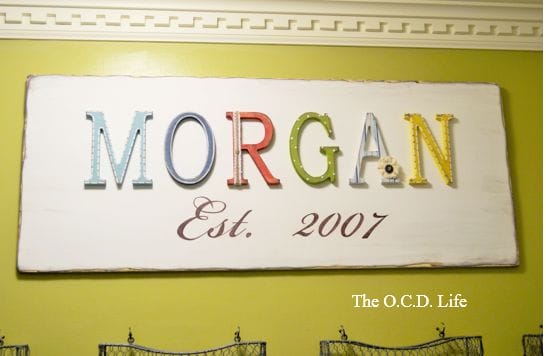
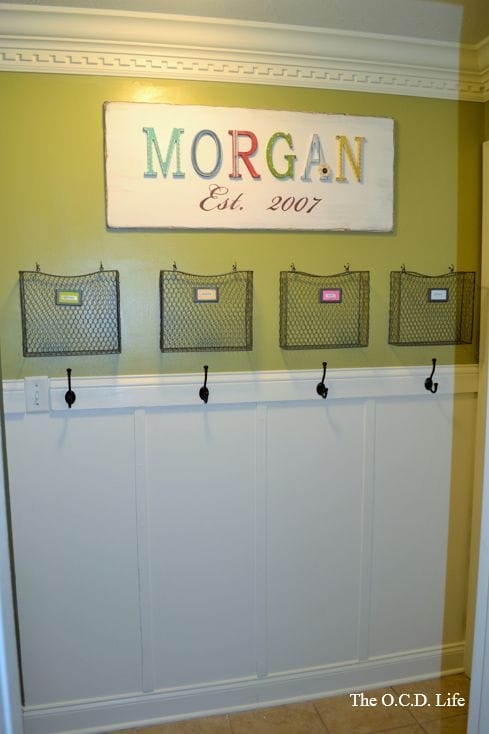
Step 12: Hang the Morgan family sign
I love this sign that Cheryl from Serendipity Hill made for me. She is one creative gal! It matches everything in my kitchen and really brings together all of the elements on this wall.
And, a look at this wall now:

My name is Kristin and I am a high school career education teacher by day and a mommy/wife/blogger by night. I am married to my high school sweetheart and we have two loving children. We live in the bootheel of Missouri in a home that is always under construction. I get excitement out of finding new creative, functional, and cute ways to organize things! I also enjoy writing and documenting life as it happens. So, I put these three loves together and created The O.C.D. Life. With the help of my husband, I am attempting to turn our house into a home. So, check out this special place of mine and take this journey with us! Learn more about me here and the meaning behind my blog’s name here.
It really looks great. This is something that would be useful in my home. thanks for including such good directions.
Thank you!!! 😉
I L.O.V.E. it!!!
Thank you!!! 🙂
She has a great blog, but the name is unfortunate.
Thank you, Jackie! I have had several people ask me about my blog name and I promise I am not being hateful to people with OCD. I actually have OCD myself, which is why I gave my blog that name. I explained it all here http://www.theocdlifestyle.net/about-the-blog/. 🙂
I totally get that you aren’t being hateful. I’m not trying to be either. I find the name unfortunate because equating cleaning and organizing with ocd is one of the biggest misconceptions of the illness. Do a bit more reading about OCD and maybe you will come to understand why the blog name and the phrase “I am a bit OCD about…” can be irksome to some people.
You are totally correct. The term OCD is thrown around way too much. I probably hear at least one person a day (whether in person, on tv, or online) say they have OCD about certain things. When, in fact, they have no idea what the disorder entails.
I have done a lot of research on the subject and had to finally admit that I have OCD! I am not proud of it, but this is my way to turn it into something positive. 🙂
I hope you have a wonderful weekend.
Yes, you too. Thanks.
So basically you self-diagnosed? 😛
It came together great! 🙂
~Sarah
Thank you! 😉
I love this and wish we had a hallway entrance. Our door opens right into the living room which is just a big square. No clue how to do this in our house and have it be really useful
Thank you! Don’t lose hope! It took me a long time to figure this out. 🙂
I love that sign. Its perfect for making everything look pretty without having to add any cumbersome decorative stuff to the command centre itself.
Thank you so much! 🙂
Love what you did here, Laura! I adore cute and highly usable stuff. Kudos to you and your husband! I can totally do something for our house. Thanks for this!
I’ve looked for baskets like that EVERYWHERE. the link on the blog is a dead end. any ideas?
Sorry about that, the link is: http://www.pickyourplum.com/
It looks great. I’m curious though, does hanging a backpack and coat on the far right hook make the door not keep the door from opening all the way?
Thank you! We actually tested it out before we started the project. I don’t think you can see in the pictures, but we have a nice size doorstop on our base board. I actually think I took the pictures before I screwed it back in. I was real hesitant at first, even after testing it. But, it worked. 😉
Love this to keep all the kids stuff from gathering on the kitchen island. I’ll be putting a boot tray underneath for the messy season. This will be great on the short wall of our mudroom – the wall you see when you walk in. We’ll be using double hooks for our 3 children. Maybe one day in the next year our mudroom will be 100% complete and I can share also 🙂